
How To Add A Growform Multi Step Form To Instapage
 Harvey Carpenter Updated 3 min read
 Instapage is an awesome landing page builder, but can be limiting if you want to create a high-converting multi step form.
Although Instapage do have a multi-step forms feature, it’s only available on their custom plans, and lacks the features of a specialist multi step form builder.
Growform – the leading multi step form builder – makes it easy to create beautiful multi step forms and embed them directly your Instapage landing page.
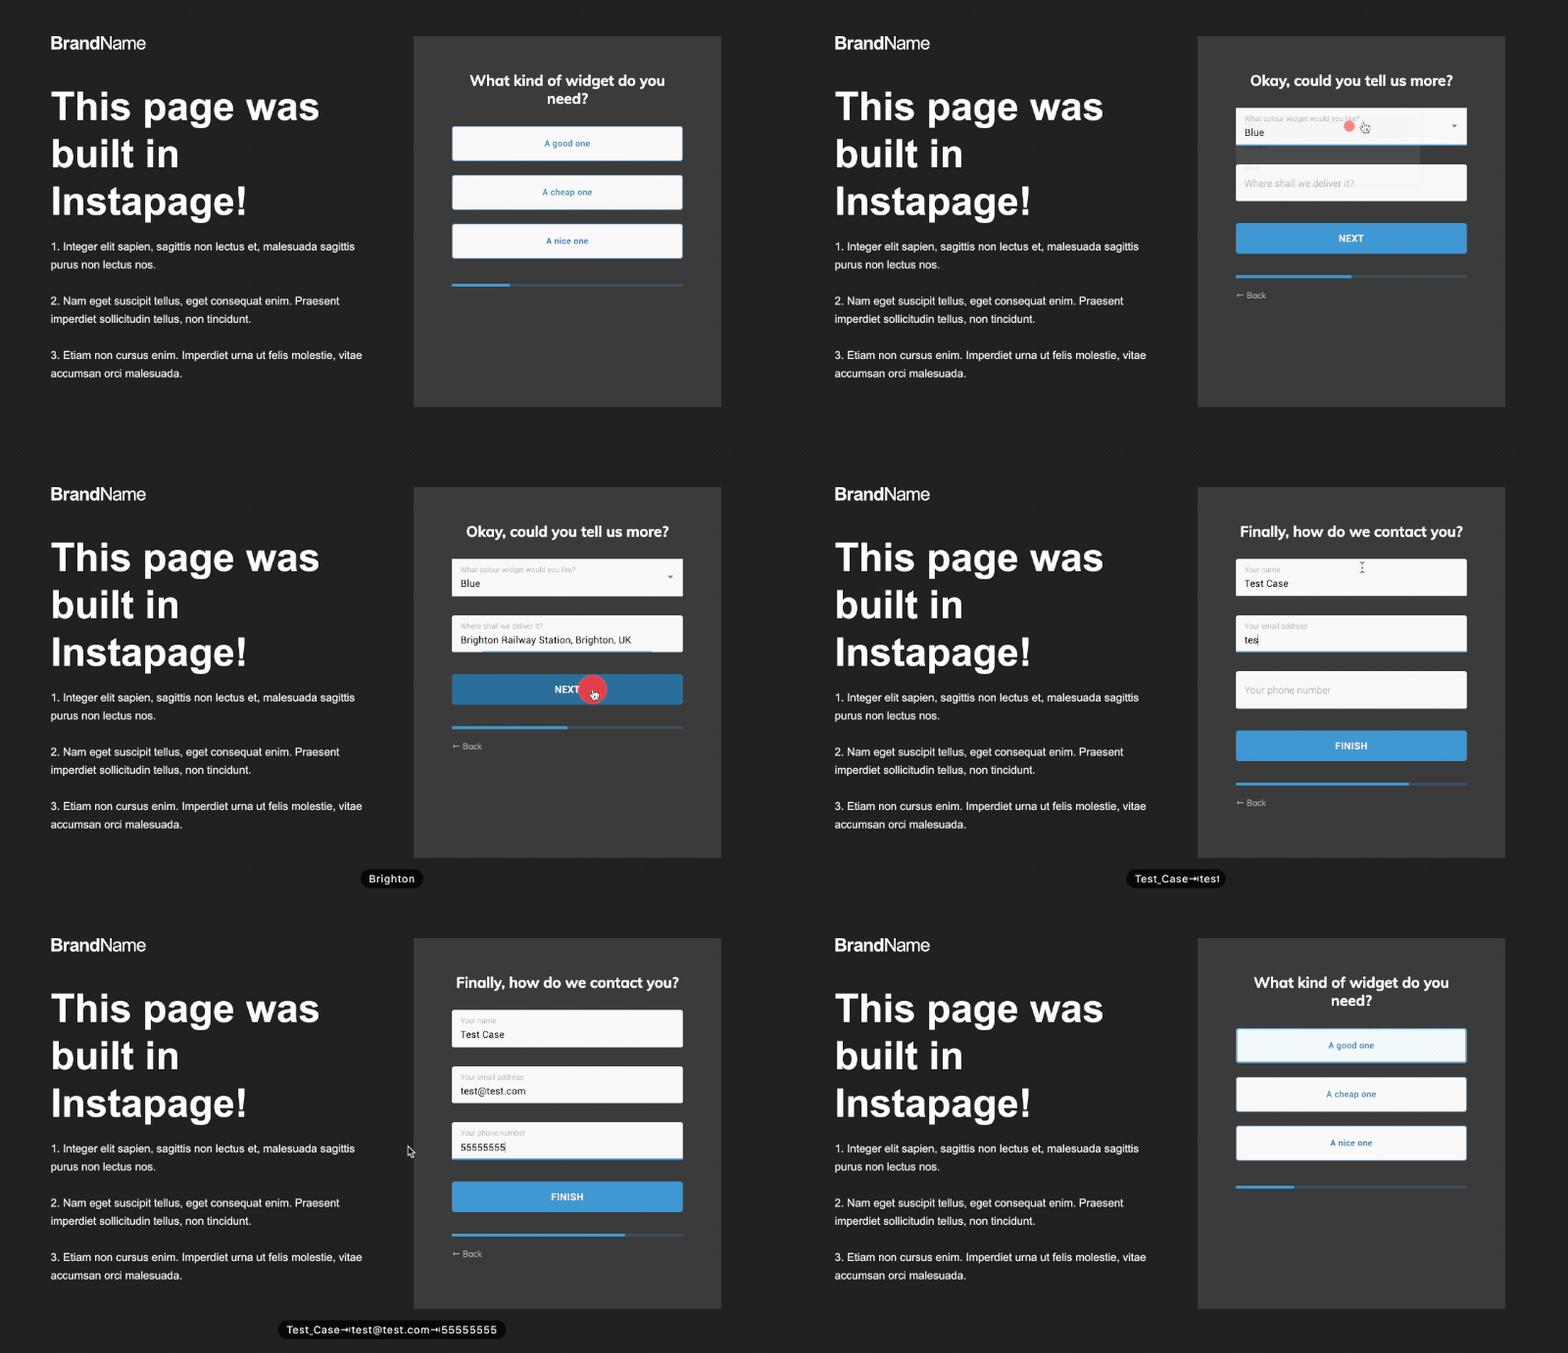
Your users will see a form that looks just like it’s part of Instapage – you’ll end up with something like this:
1 – Create a form on Growform
To get started, you’ll first need to create a form on Growform. It’s available as a 14 day free trial, with no credit card required – get started.
The first step will look something like this:

Follow our getting started guide if you need help creating your first form.
2 – Get your Growform share code
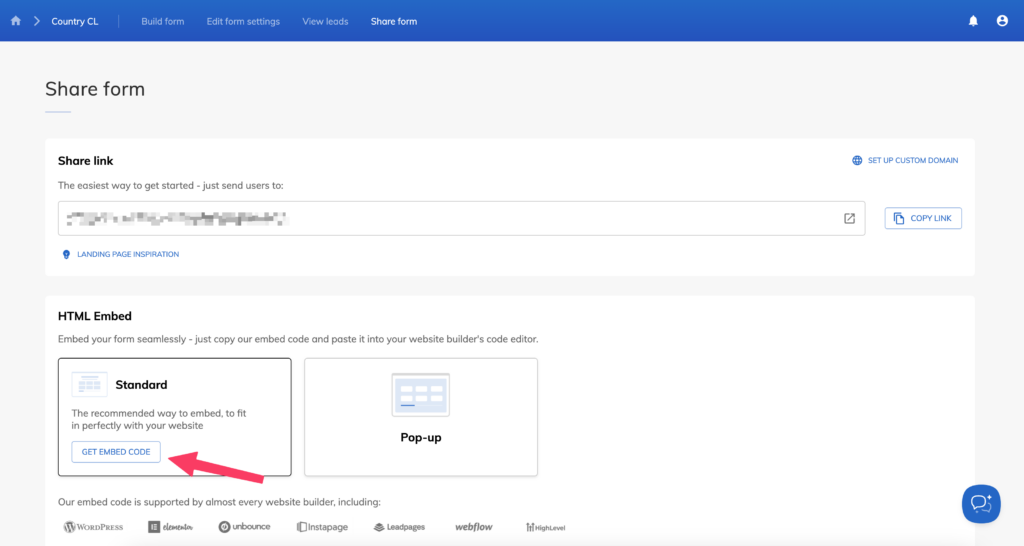
Grab your Growform share code by navigating to the “share form” menu item in the top navigation bar.
Click “Get embed code”, then hit “Copy embed code”.
3 – Add a custom HTML block to Instapage
Now, open up your landing page in the Instapage editor. You’ll want to delete any forms you may have already.
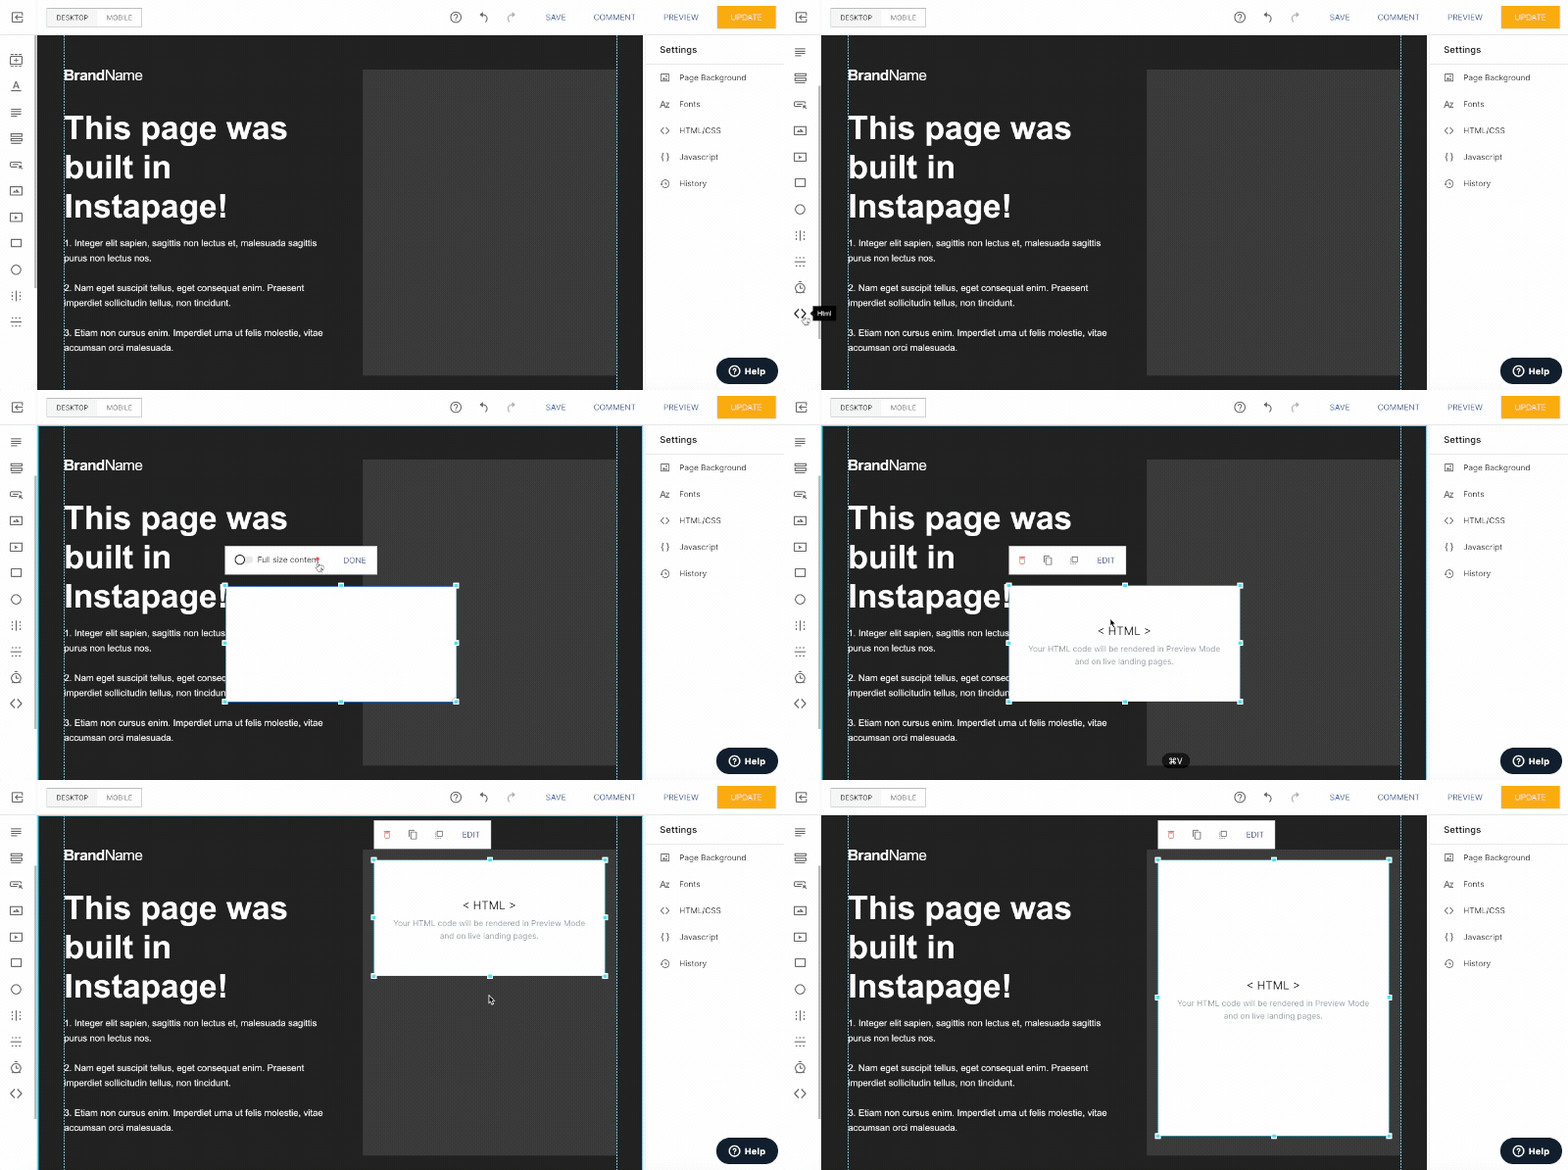
Then, find the “HTML” widget on the left-hand side. It looks like a pair of code brackets ( <> ).
Note: You may need to scroll to find the HTML widget – it’s the very last one!
Then, click the HTML widget, hit “Edit” and paste your code into the box. Click “Done”.
Now, reposition the box so it fits into your design.
Here’s a gif of the whole process:
Hit “Save” and “Update” to finish this step.
Due to the way Instapage works, custom HTML (including Growform’s multi-step form widget) will not be rendered in preview mode. Don’t worry – you can check your form works by publishing it.
4 – Publish your form and make some adjustments
When you publish your form, you’ll probably see a form something like this, depending which template you used:

This means you’re really close – you just need to make a few adjustments to get your form looking absolutely perfect:
- In Growform’s “Theme” settings, set the parent container background to “color”, and choose a background color matching the color in Instapage.
- Remove any headers/instructions at the top of your Growform form – you can always add these to the space above in Instapage.
- Adjust your form’s primary color (which affects progress bars and accents), as well as the range of other colour settings.
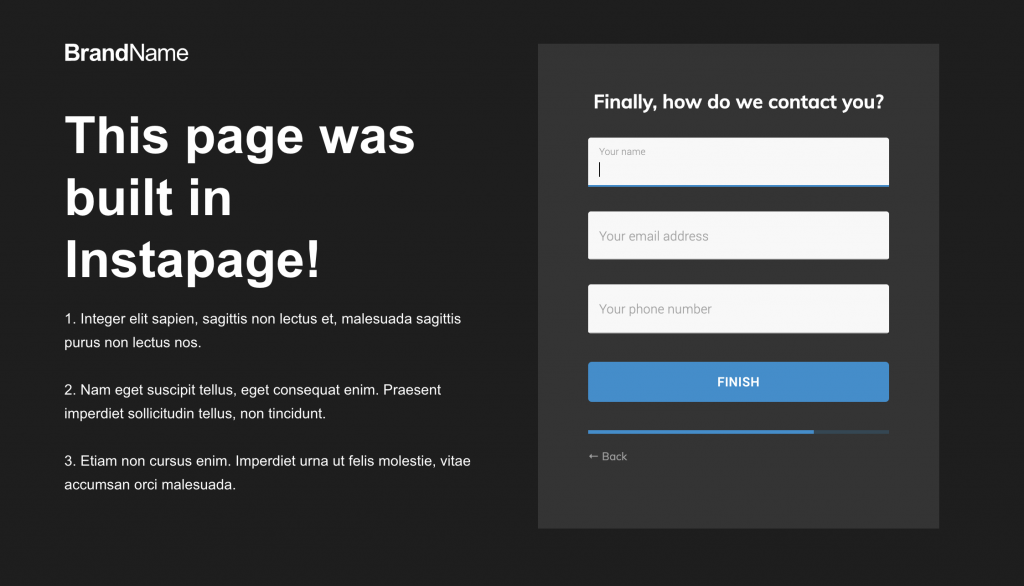
By taking a moment to adjust the design settings, we can achieve a multi step form in Instapage, that looks perfectly aligned with the design and part of the page:
5 – Optionally, set up conversion tracking and lead destinations
Now we have our Instapage multi step form set up, where do the leads go?
The leads will appear in your Growform account, and will be emailed to you by default. You can also use Zapier to send your leads to more than 7,000 apps.
Instapage’s own help center explains that embedded forms sit outside its native form system. They don’t use Instapage’s lead collection, native integrations or lead notification emails, and their submissions aren’t counted by the “Form submissions” conversion goal.
This means there’s no need to configure anything further (like forms and lead notifications) in your Instapage account – as this will live in Growform now. Set up your email alerts, webhooks and Zapier delivery in Growform before you send traffic, because Instapage won’t catch the leads for you.
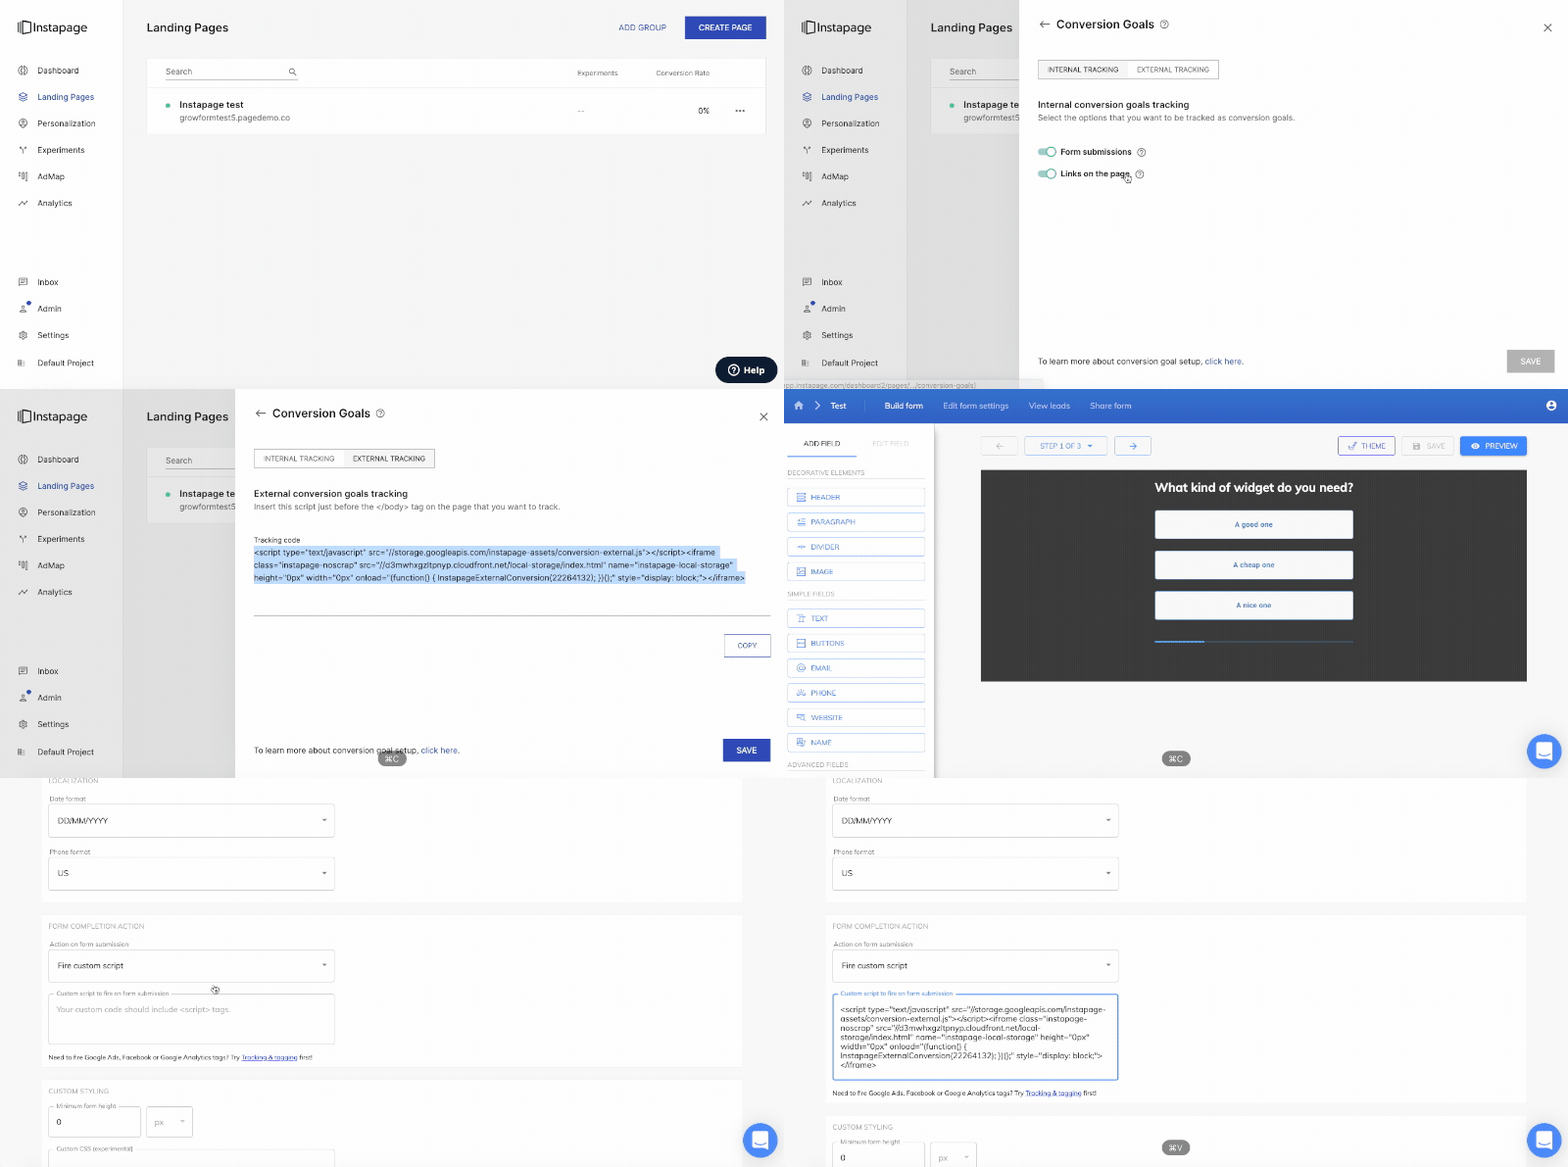
To keep conversions counted in Instapage, fire Instapage’s external tracking code – just copy their code and add it to Growform’s “Custom script to fire on form submission” option under form settings:
Need more? We’re actively working on our Instapage offering.
Please get in touch with our experienced support team if we can help with anything, including helping to configure your account.
Related articles

Growform Mass Tort Intake Forms for Better Screening
Growform helps mass tort marketers and intake teams turn paid traffic into better-screened claimant leads.
September 30, 2026

Growform Debt Relief Forms for Qualified Lead Intake
Debt relief lead forms have to do more than convert.
September 30, 2026

Growform CRM Forms With Hidden Field Pass-Through Built In
September 30, 2026