

If you want to see conversions appear on your Google Ads dashboard when users submit your form, you’re in the right place.
Before getting started, you’ll need to have set up a Google Tag Manager container and added it to Growform. Do that first, here.
1 – Create a conversion in Google Ads
First, log into Google Ads and hit “Tools” in the top toolbar, then navigate to “Conversions.
From here, you’ll be able to create a new conversion.
Enter the conversion details (such as conversion name and value), and hit “Next”.
2 – Get the conversion details from Google Ads
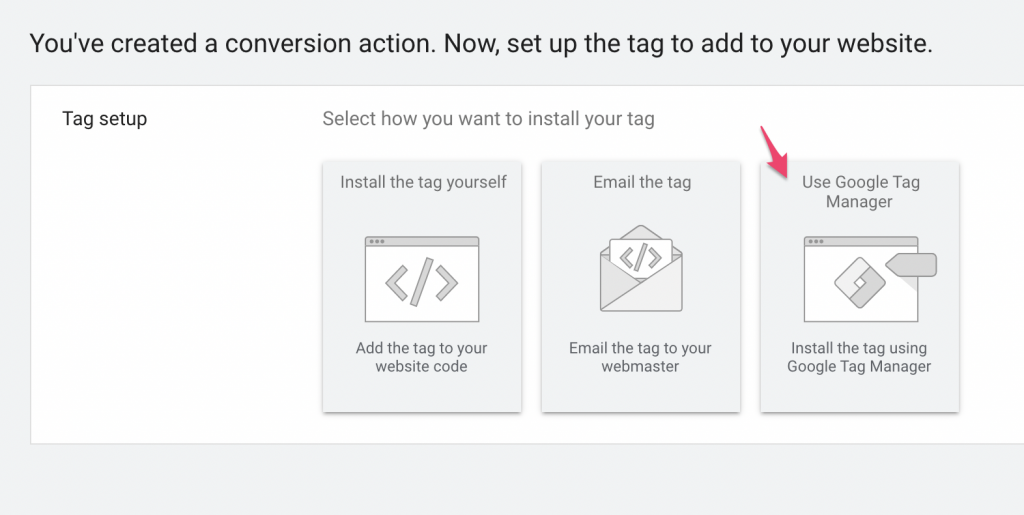
Once you’ve created your conversion in Google Ads, under “Select how you want to install your tag”, choose “Use Google Tag Manager“:
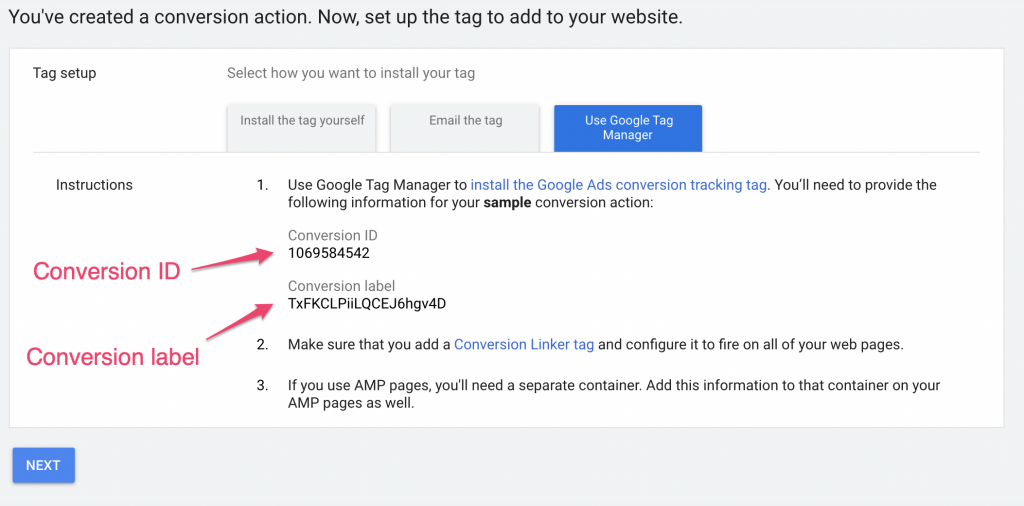
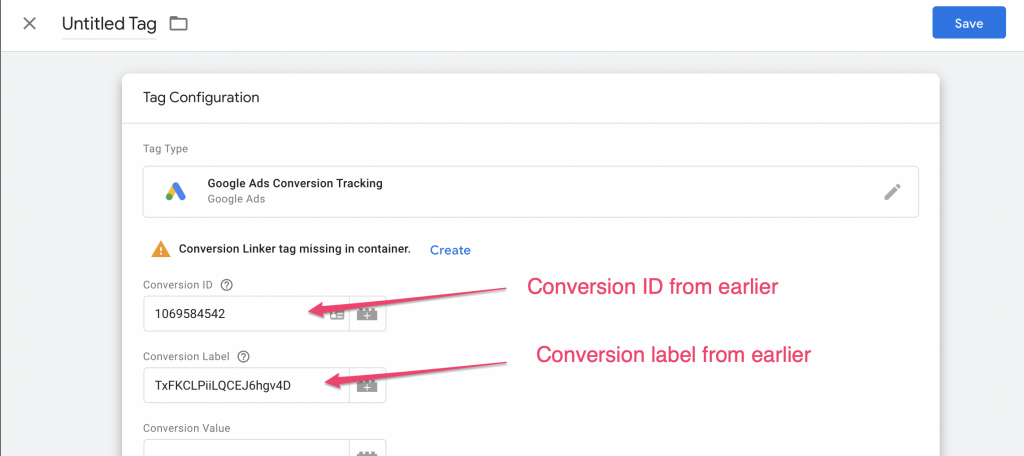
You should now take note of your conversion ID and conversion label, as we’ll need them when we create the tag in Google Tag Manager:
3 – Create the tag in Google Tag Manager
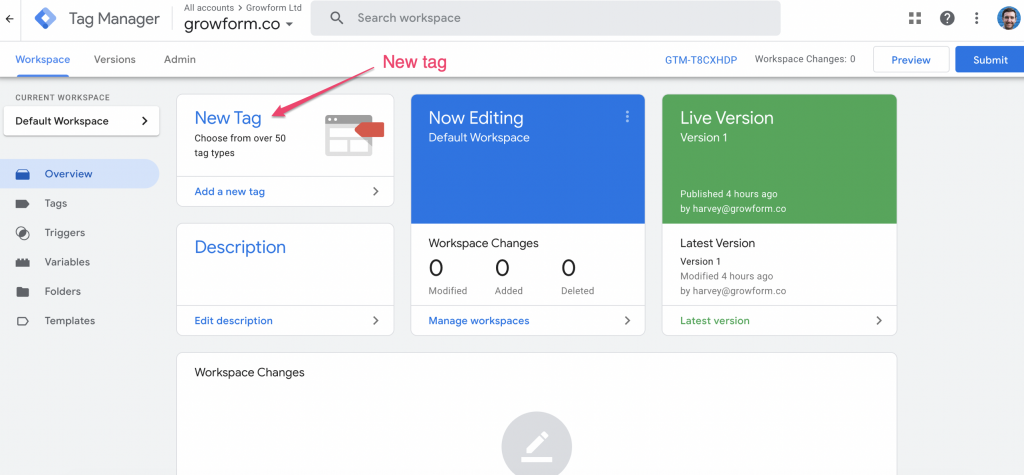
Open Google Tag Manager and hit “New Tag”:
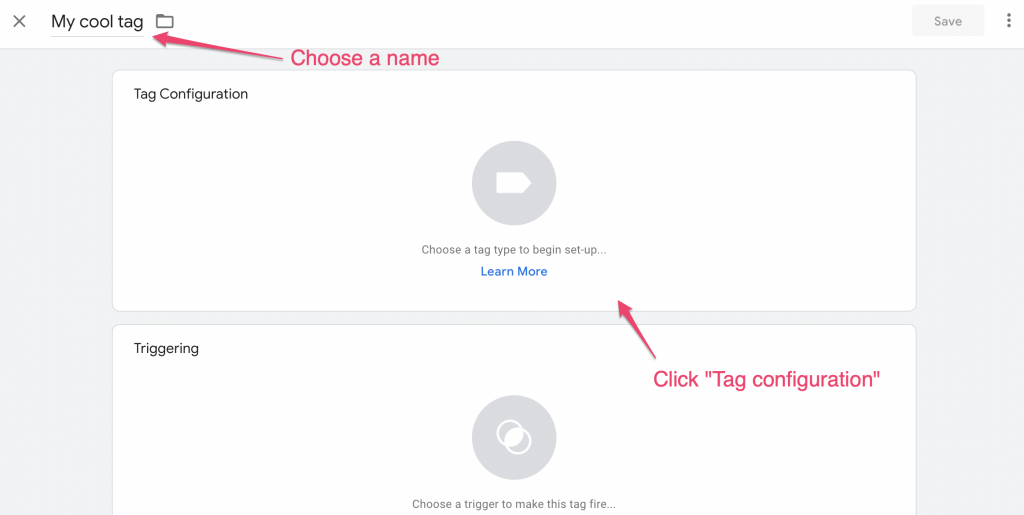
Then, add a name for your tag and click the “Tag configuration” box:
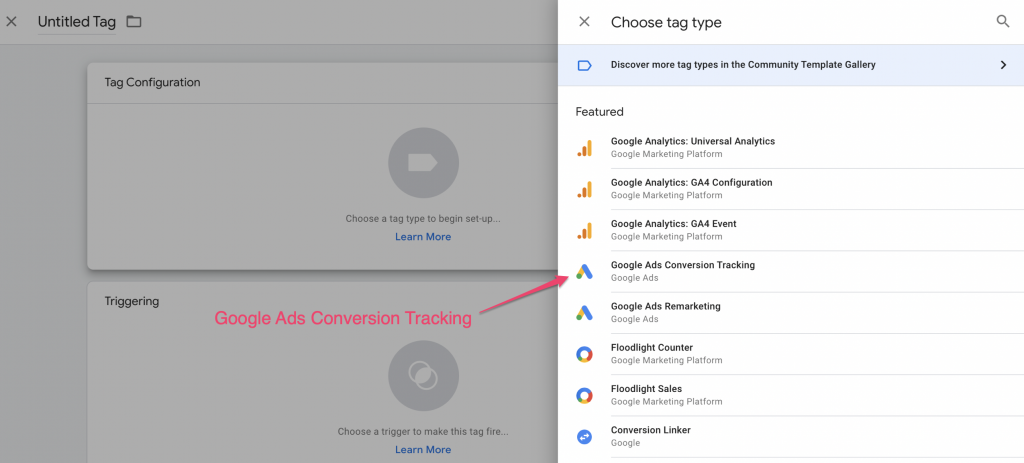
Now, choose “Google Ads Conversion Tracking” from the long list:
Once you’re editing the tag, enter the conversion ID and conversion label you got from step 2:
Then, hit the “Triggering” box to choose a trigger. Choose “All pages” and then save your tag.
Why “All pages”? For now, this tag container is only implemented on the form’s “thank you” step. If you’re an experienced GTM user or are bulking out your container, you’ll probably wish to fire the tag only on certain events.
4 – Publish your tag container
To recap, we have:
- Created a conversion in Google Ads
- Copied down the conversion ID and label
- Created a new tag in Google Tag Manager with those details
- Set the tag to fire on “all pages” (there is only one “page” this tag container will be seen – the thank you step).
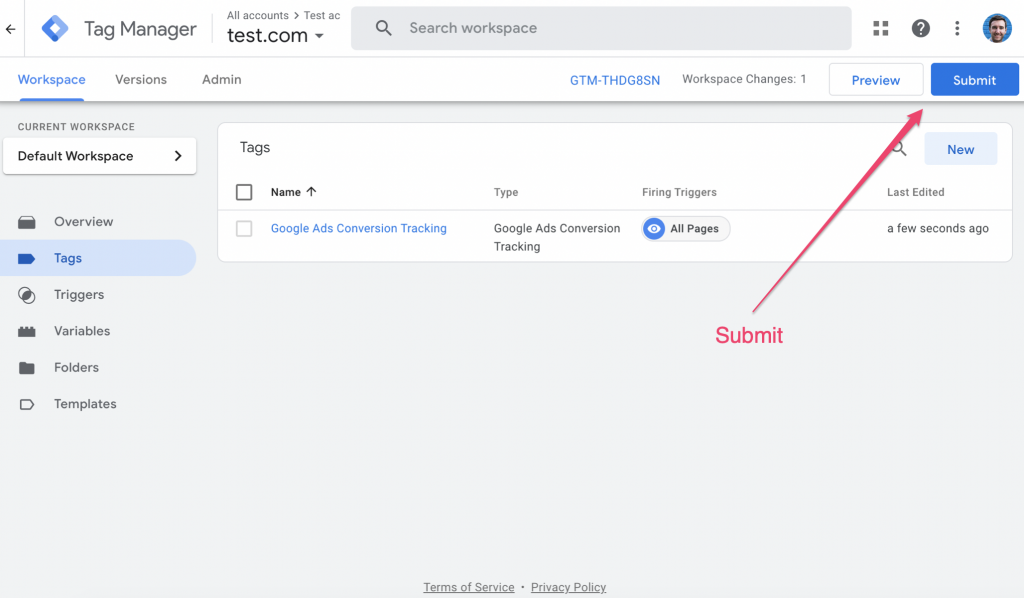
We now just need to hit “Submit” to submit our changed container:
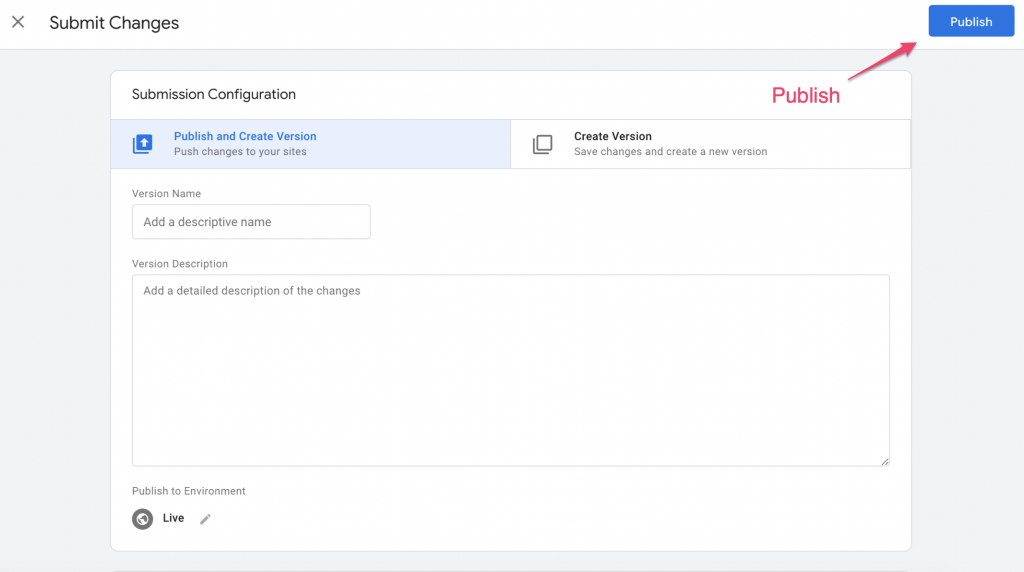
… and then “Publish” to publish those changes:
And that’s a wrap!
A quick note on conversion linker
Google recently added a new tag called “conversion linker”, which should be fired on all pages in your container for best results.
To do this, you can create a new tag in Google Analytics (as we did above), but fire the Conversion Linker tag on all pages. Simple!
Need to track something more clever? Our support team are more than happy to help with custom tracking enquiries – talk to us on live chat!
Related articles

Growform Mass Tort Intake Forms for Better Screening
Growform helps mass tort marketers and intake teams turn paid traffic into better-screened claimant leads.
September 30, 2026

Growform Debt Relief Forms for Qualified Lead Intake
Debt relief lead forms have to do more than convert.
September 30, 2026

Growform CRM Forms With Hidden Field Pass-Through Built In
September 30, 2026